
Buttermilk Biscuits – EASY Recipe!

Table of Contents
Did you know that Americans consume over five billion of these golden, flaky treats every single year? There is something truly magical about pulling a warm tray from the oven that fills your kitchen with a comforting aroma. Mastering the perfect buttermilk biscuits does not require professional training or hours of labor? Get ready to make Buttermilk Biscuits – EASY Recipe!
You can achieve bakery-quality results right at home with this incredibly easy recipe. We have simplified the steps to ensure your dough stays light and airy every time you bake. Whether you are a novice in the kitchen or a seasoned pro, this reliable biscuit recipe will become a staple in your household, especially the Buttermilk Biscuits – EASY Recipe!
Gather your ingredients and prepare to impress your family with a classic comfort food. This easy recipe proves that you do not need complicated techniques to create something delicious. Follow along as we break down the secrets to making the best buttermilk biscuits you have ever tasted. Let’s get started on your new favorite biscuit recipe today with the Buttermilk Biscuits – EASY Recipe!
The Science Behind Flaky Buttermilk Biscuits
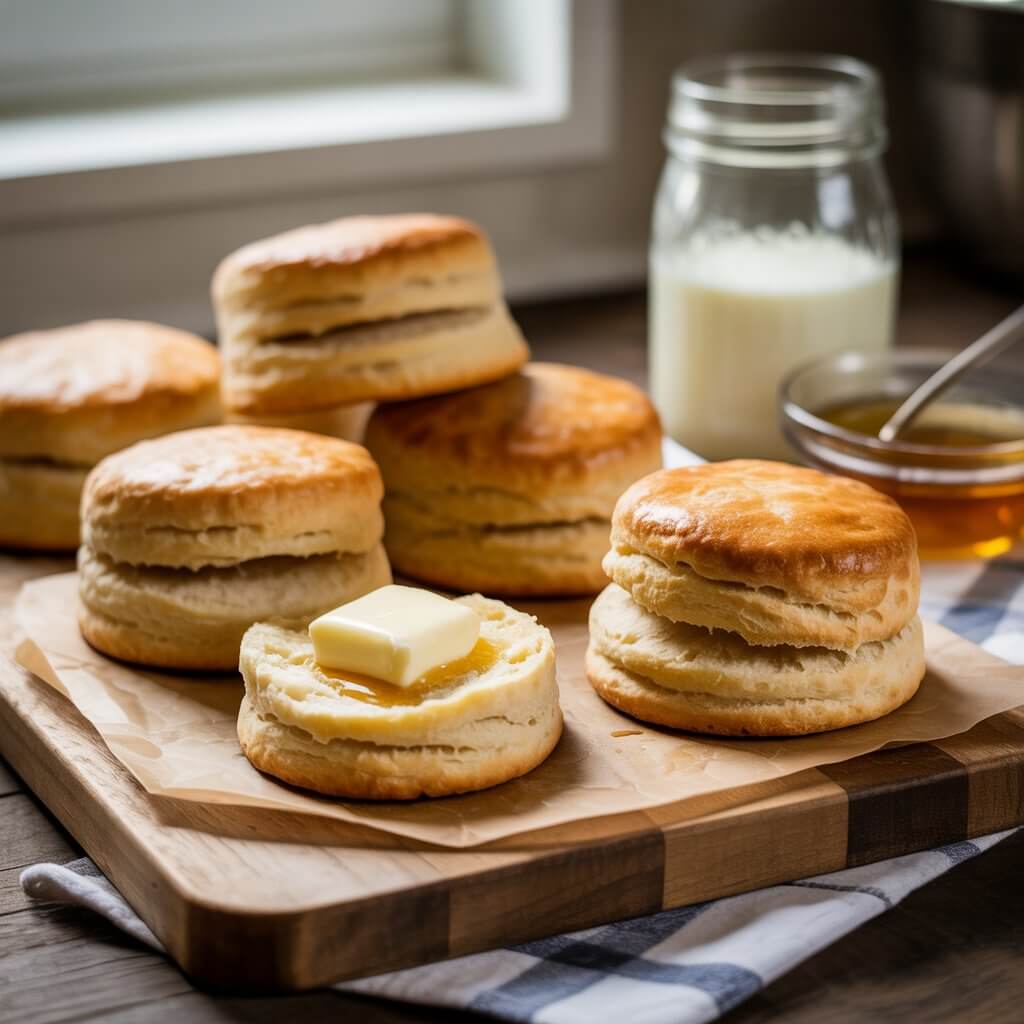
With our Buttermilk Biscuits – EASY Recipe!, you’ll enjoy golden, flaky biscuits that are perfect for any occasion!
To achieve the perfect flaky buttermilk biscuits, it’s essential to grasp the underlying principles that make them so tender and layered. The science behind these delicious biscuits involves understanding the roles of key ingredients and techniques.
The texture and layering of flaky buttermilk biscuits are primarily due to two critical factors: the use of buttermilk and the incorporation of cold butter into the dough.
Why Buttermilk Matters for Texture
Buttermilk is not just a simple ingredient; it’s a crucial element that contributes to the tender texture and tangy flavor of biscuits. The acidity in buttermilk reacts with the baking soda, a leavening agent, to produce carbon dioxide gas. This reaction is what gives biscuits their light and tender texture.
Moreover, the moisture content in buttermilk helps to keep the biscuits soft. The acidity in buttermilk is key to creating a tender crumb. When buttermilk’s acidity meets the baking soda, it triggers a chemical reaction that releases carbon dioxide. This process not only helps in leavening the biscuits but also contributes to their tender texture.
The Role of Cold Butter in Layering
Cold butter is another vital component in the making of flaky biscuits. When cold butter is cut into the dry ingredients, it creates a mixture where the butter remains in small, solid pieces. As the biscuit dough is rolled out, these pieces of butter create layers within the dough.
During baking, the butter melts, and the water within it turns to steam, causing the layers to separate and creating the flaky texture. The process of cutting cold butter into the dry ingredients is crucial. It ensures that the butter remains in distinct pieces, which then create the layers as the dough is rolled and folded.
Essential Ingredients for Your Homemade Biscuits
To make exceptional homemade biscuits, it’s crucial to start with the right ingredients. The quality and type of ingredients you choose will directly impact the texture, flavor, and overall success of your buttermilk biscuits.
The ingredients may seem simple, but each plays a vital role in creating the perfect biscuit. Let’s dive into the key components that make up great homemade biscuits.
Selecting the Right Flour
The foundation of a great biscuit is the flour. For traditional Southern-style biscuits, it’s best to use White All-Purpose Flour with a low protein content. This type of flour provides the right balance between strength and tenderness.
Using the right flour ensures that your biscuits are not too dense or tough. All-purpose flour with a protein content around 10% is ideal for achieving the desired flaky layers.
Choosing Quality Buttermilk
Buttermilk is a critical ingredient that gives biscuits their characteristic tang and tenderness. When selecting buttermilk, opt for full-fat, cultured buttermilk for the best flavor.
If you’re unable to find buttermilk, you can make a substitute by mixing 1 cup of milk with 1 tablespoon of white vinegar or lemon juice. Let it sit for 5-10 minutes to curdle before using.
The Importance of Leavening Agents
Leavening agents are essential for giving biscuits their rise. Baking powder is the primary leavening agent used in biscuit recipes. It’s a mixture of baking soda and an acid that reacts when it comes into contact with liquid ingredients and heat.
Ensure your baking powder is fresh, as expired or old baking powder can result in biscuits that don’t rise properly.
Buttermilk Biscuits – EASY Recipe
Ingredients
- 2 cups all-purpose flour
- 1 tbsp baking powder
- 1/2 tsp baking soda
- 1 tsp salt
- 1 tbsp sugar (optional)
- 1/2 cup (115g) cold unsalted butter (cubed)
- 3/4 cup cold buttermilk (plus more if needed)
- Extra butter (for brushing)
Instructions
- Preheat oven to 220°C (425°F). Line a baking tray with parchment paper.
- Mix dry ingredients
In a large bowl, whisk together flour, baking powder, baking soda, salt, and sugar. - Cut in the butter
Add cold butter cubes and mix using your fingers or a pastry cutter until the mixture looks like coarse crumbs. - Add buttermilk
Pour in the buttermilk and gently mix until a soft dough forms. Do not overmix. - Shape the dough
- Turn dough onto a floured surface
- Pat into a 2 cm (¾ inch) thick rectangle
- Fold it over 2–3 times (this creates flaky layers)
- Cut biscuits using a round cutter
- Bake
Place biscuits on the tray (touching slightly for softness).
Bake for 12–15 minutes or until golden brown. - Finish
Brush tops with melted butter and serve warm.
Pro Tips
- Use very cold butter for flaky layers
- Don’t twist the cutter — it helps biscuits rise higher
- For extra flavor, add shredded cheese or herbs
Variations
- Cheddar Biscuits: Add 1 cup shredded cheddar
- Garlic Butter: Brush with garlic butter after baking
- Sweet Version: Add honey or jam on top
Preparing Your Workspace and Tools

Before diving into the biscuit recipe, it’s crucial to prepare your workspace and tools for a seamless baking experience. A well-organized kitchen not only makes the baking process more efficient but also helps in achieving consistent results.
Necessary Kitchen Equipment
To make buttermilk biscuits, you’ll need a few essential tools. These include a mixing bowl, a pastry blender or your fingertips for cutting butter, a lightly floured surface for kneading, a biscuit cutter, and a baking sheet lined with parchment paper. Ensuring you have these tools on hand will streamline your baking process.
Additionally, having a cool surface to work on is beneficial, as it helps keep the butter cold, a critical factor in achieving flaky biscuits.
Creating the Ideal Temperature Environment
The temperature of your kitchen and ingredients plays a significant role in biscuit baking. Cold ingredients, particularly cold butter and buttermilk, are vital for creating the layers that make biscuits flaky.
To maintain the right temperature, ensure your kitchen is at a comfortable temperature, not too hot or too cold. If you’re baking in a warm environment, consider refrigerating your mixed dough for a few minutes to keep the butter from melting.
- Keep your butter and buttermilk refrigerated until use.
- Work in a cool environment to prevent butter from melting.
- Refrigerate the dough if your kitchen is too warm.
Mastering the Buttermilk Biscuits – EASY Recipe!

To master the art of making buttermilk biscuits, start with a simple yet crucial step: combining the dry ingredients. This foundational step sets the stage for the rest of the recipe, ensuring your biscuits turn out light, flaky, and delicious.
Combining Dry Ingredients
The dry ingredients are the backbone of your buttermilk biscuits. In a large bowl, whisk together 2 cups of all-purpose flour, 4 teaspoons of baking powder, 1 teaspoon of salt, and 1 tablespoon of granulated sugar. Whisking these ingredients not only mixes them but also incorporates air, which is essential for the biscuits’ texture.
Using the right type of flour is crucial. All-purpose flour is recommended for its balanced protein content, which supports the structure of the biscuits without making them too tough.
Cutting in the Butter
Cutting in the butter is a critical step that contributes to the flaky texture of your biscuits. Add 1/2 cup of cold, cubed butter to the dry ingredients. Use a pastry blender or your fingertips to work the butter into the flour mixture until it resembles coarse crumbs with some larger pea-sized pieces of butter remaining.
This process, known as “cutting in,” is essential for creating the layers in your biscuits. The cold butter will melt during baking, creating steam that gets trapped between the layers of dough, resulting in a flaky texture.
Mixing the Dough Gently
After cutting in the butter, it’s time to add the buttermilk. Pour in 3/4 cup of buttermilk, and gently fold the mixture until it just comes together in a shaggy dough. Be careful not to overmix, as this can lead to tough biscuits.
The dough will appear somewhat rough and not fully cohesive at this stage, but it will come together during the kneading process. The key is to mix gently and briefly, preserving the delicate layers created during the cutting-in process.
Techniques for Perfect Biscuit Dough

To create tender and layered biscuits, it’s essential to understand the techniques involved in preparing the dough. Mastering these techniques will help you achieve the perfect balance of flakiness and tenderness in your biscuits.
Folding for Maximum Layers
Folding is a critical step in creating the layers that make biscuits flaky. To fold the dough effectively, gently lift and fold it over onto itself a few times. This process, known as laminating, creates the layers of butter and dough that will eventually bake into flaky, tender biscuits.
The key is to be gentle and not overwork the dough during the folding process. Overworking can lead to a dense, tough biscuit. By folding the dough just a few times, you can create multiple layers without developing the gluten too much.
Handling the Dough Without Overworking
Handling the dough gently is crucial to preventing overworking. When you mix and fold the dough, use a light touch to minimize the development of gluten. Overworked dough can lead to biscuits that are tough and dense rather than tender and flaky.
To avoid overworking, mix the ingredients just until they come together in a shaggy mass, and then gently fold the dough a few times to create layers. This approach will help you achieve a tender, flaky texture in your biscuits.
Rolling and Cutting Tips
When rolling out the dough, use a gentle, even motion to achieve a uniform thickness. This will help ensure that your biscuits bake evenly. Aim for a thickness of about 1 inch to allow for proper rising and browning.
For cutting the biscuits, use a biscuit cutter or the rim of a glass to cut out the shapes. Press the cutter straight down into the dough without twisting it, as twisting can cause the edges to become misshapen and prevent the biscuits from rising evenly.
By following these techniques for preparing the biscuit dough, you can create delicious, flaky biscuits that are sure to impress. Whether you’re a seasoned baker or just starting out, mastering these techniques will help you achieve perfect biscuits every time.
Baking for Golden Brown Perfection

Baking is where the magic happens, turning your biscuit dough into golden brown treats. To achieve this perfection, it’s essential to understand the nuances of the baking process.
Oven Temperature and Placement
Preheating your oven to the right temperature is crucial. For homemade biscuits, a temperature of 425°F (220°C) is typically recommended. Ensure your oven is accurately calibrated to avoid under or overcooking.
The placement of biscuits in the oven also matters. Placing them on a middle rack allows for even heat distribution. If you’re baking multiple trays, rotate them halfway through the baking time to ensure uniform browning.
Recognizing When Biscuits Are Done
Biscuits are done when they are golden brown on top. The baking time can vary depending on the size of your biscuits and your oven’s performance. Generally, it takes between 12 to 15 minutes.
To check if they’re done, look for a golden brown color on the tops and edges. You can also gently lift one biscuit to check the bottom; it should be lightly browned.
| Biscuit Size | Baking Time | Visual Cue |
|---|---|---|
| Standard | 12-15 minutes | Golden brown top |
| Mini | 8-10 minutes | Lightly golden |
| Jumbo | 18-20 minutes | Deep golden brown |
Achieving the Perfect Crust
The perfect crust is a balance between crunch and tenderness. Brushing the tops with a little extra melted butter before baking can enhance the crust’s flavor and color.
To achieve a crispy crust, bake the biscuits until they are golden brown. Avoid overcrowding the baking sheet, as this can cause the biscuits to steam instead of bake, resulting in a softer crust.
By following these guidelines, you’ll be able to bake your homemade biscuits to a perfect golden brown, achieving that ideal balance of texture and flavor.
Common Mistakes and How to Avoid Them
To make the perfect southern-style biscuits, it’s essential to understand the pitfalls that can ruin your baking experience. Baking biscuits can be a delicate process, but by being aware of common mistakes, you can significantly improve your results.
Preventing Dense or Tough Biscuits
One of the most common issues with homemade biscuits is that they can turn out dense or tough. This is often due to overworking the dough, which develops the gluten in the flour, leading to a less tender biscuit.
To avoid this, mix your wet and dry ingredients separately and gently fold them together until just combined. It’s also crucial to handle the dough as little as possible after it has been mixed.
Troubleshooting Uneven Rising
Uneven rising can be another issue when baking biscuits. This can be caused by several factors, including uneven oven temperature or overcrowding the baking sheet.
To ensure your biscuits rise evenly, make sure to leave enough space between each biscuit on the baking sheet. Also, consider using a baking stone in your oven to help distribute heat more evenly.
| Common Mistake | Cause | Solution |
|---|---|---|
| Dense or Tough Biscuits | Overworking the dough | Mix ingredients gently and handle dough minimally |
| Uneven Rising | Uneven oven temperature or overcrowding | Leave space between biscuits and use a baking stone |
Creative Variations for Southern-Style Biscuits
The versatility of Southern-style biscuits allows for a myriad of creative variations, from savory to sweet. This flexibility makes them perfect for any meal, whether you’re looking for a new twist on a classic breakfast or a unique side dish for dinner.
One of the simplest ways to add a creative spin to your Southern-style biscuits is by incorporating different flavors into the dough. This can be achieved through various ingredients, enhancing the biscuit’s overall taste and texture.
Adding Herbs and Cheese
For a savory twist, consider adding fresh or dried herbs like chives, rosemary, or thyme to your biscuit dough. These herbs not only add a burst of flavor but also complement a variety of cheeses. Cheddar and Parmesan are excellent choices, providing a rich, tangy flavor that pairs well with the herbs.
To incorporate herbs and cheese effectively, you can mix them into the dry ingredients before adding the cold butter. This ensures an even distribution of flavors throughout the dough. For an extra burst of flavor, brush the tops of the biscuits with melted butter and sprinkle with additional herbs or cheese before baking.
Sweet Variations for Breakfast
Southern-style biscuits can also be adapted for sweet breakfast treats. By adding ingredients like dried cranberries, cherries, or even chocolate chips, you can create a delicious breakfast biscuit that’s perfect with a cup of coffee or tea.
Another sweet variation involves incorporating a hint of cinnamon or nutmeg into the dough, giving the biscuits a warm, spicy flavor. You can also top the biscuits with a simple glaze made from powdered sugar and milk for an extra touch of sweetness.
Experimenting with different creative variations not only keeps your baking exciting but also allows you to tailor your breakfast biscuits to suit any taste or occasion. Whether you’re in the mood for something savory or sweet, the basic Southern-style biscuit recipe provides a versatile foundation for your culinary creativity.
Storing and Reheating Your Homemade Biscuits
To make the most of your biscuit recipe, it’s essential to know the best storage and reheating methods. Proper storage and reheating techniques can help maintain the freshness and quality of your homemade biscuits.
After baking, it’s crucial to store your biscuits correctly to preserve their texture and flavor. There are several methods to store biscuits, depending on whether you plan to consume them soon or later.
Freezing Unbaked Dough
Freezing unbaked dough is an excellent way to preserve your biscuits for future use. To freeze, place the cut biscuits on a baking sheet lined with parchment paper and put it in the freezer until they are frozen solid. Then, transfer the frozen biscuits to a freezer-safe bag or container for storage.
| Freezing Method | Benefits | Storage Duration |
|---|---|---|
| Freezing Unbaked Dough | Preserves texture and flavor, convenient for future baking | Up to 2 months |
| Freezing Baked Biscuits | Easy to reheat, maintains freshness | Up to 1 month |
Best Methods for Reheating Leftovers
Reheating leftover biscuits can be done in several ways, depending on your preference and the equipment available. The most common methods include using an oven or a microwave.
Oven Reheating: Preheat your oven to 350°F (175°C). Wrap the biscuits in foil to prevent drying out and heat them for 5-10 minutes, or until warmed through.
Microwave Reheating: Wrap the biscuits in a damp paper towel to maintain moisture. Heat on high for 20-30 seconds or until the biscuits are warm.
By following these storage and reheating tips, you can enjoy your homemade biscuits over a longer period while maintaining their quality and freshness.
Conclusion
With the simple steps outlined in this article, making delicious buttermilk biscuits at home is now within reach. By understanding the science behind flaky layers and using quality ingredients, you can create tender, golden brown biscuits that are sure to impress.
The easy recipe provided allows for a straightforward approach to baking, while the various techniques and creative variations offer room for experimentation and personalization. Whether you’re a seasoned baker or just starting out, this buttermilk biscuits recipe is a great addition to your repertoire.
So, gather your ingredients, preheat your oven, and get ready to enjoy the warm, comforting goodness of freshly baked buttermilk biscuits. With practice, you’ll be whipping up batches like a pro, and your family and friends will surely appreciate the effort you put into making these tasty treats.
FAQ
What makes this specific buttermilk biscuit recipe an easy recipe for beginners?
This biscuit recipe is designed for simplicity, focusing on high-quality ingredients like King Arthur All-Purpose Flour and a straightforward mixing process. By following our biscuit baking tips, such as keeping your fats cold and avoiding over-mixing, even a first-time baker can produce professional-grade homemade biscuits with minimal effort.
Why is buttermilk so essential for creating authentic southern-style biscuits?
Buttermilk is the “secret sauce” of the South for two reasons: acidity and thickness. The acid in the buttermilk reacts with leavening agents like baking soda to create a significant rise, while its viscosity adds a rich, tangy flavor and tender crumb that you simply can’t achieve with regular milk. For the best results, many chefs recommend using Marburger Farm Dairy buttermilk.
How do I ensure I get those coveted flaky biscuits with distinct layers?
The key to flaky biscuits is “laminating” the dough. This involves gently folding the buttermilk biscuit dough over itself several times during the preparation process. Additionally, using ice-cold Land O’Lakes unsalted butter ensures that small pockets of fat remain intact; when these melt in the oven, they create steam that lifts the dough into beautiful, flaky layers.
Can I use any type of flour for this southern-style biscuit base?
While all-purpose flour works well, many traditionalists insist on White Lily Flour. It is milled from soft red winter wheat and has a lower protein content, which is the gold standard for creating the light, airy texture associated with the finest southern-style biscuits. If you can’t find it, a 50/50 mix of all-purpose and cake flour is a great substitute.
What is the most common mistake people make when handling buttermilk biscuit dough?
The most frequent error is overworking the dough. When you knead or mix too aggressively, you develop the gluten, which leads to tough, bread-like rounds rather than tender breakfast biscuits. Handle the dough as little as possible—just until it barely comes together—to keep the texture light and delicate.
How should I cut the biscuits to make sure they rise straight up?
When using your biscuit cutter, the golden rule is: never twist. Press the cutter straight down into the buttermilk biscuit dough and pull it straight back up. Twisting the cutter “seals” the edges of the dough, which prevents the layers from expanding upward, often resulting in lopsided or stunted homemade biscuits.
How can I store and reheat my breakfast biscuits so they stay fresh?
To keep your breakfast biscuits tasting fresh, store them in an airtight container at room temperature for up to 48 hours. When you’re ready to eat, the best reheating method is in a 350°F oven for about 5 minutes; this restores the crispness of the crust. For long-term storage, you can freeze the unbaked rounds and pop them directly into the oven whenever a craving strikes!
Did you Try Our Recipe?
There are no reviews yet. Be the first one to write one.